
By Chip Israel
LEDs have changed everything, except the physics of lighting.
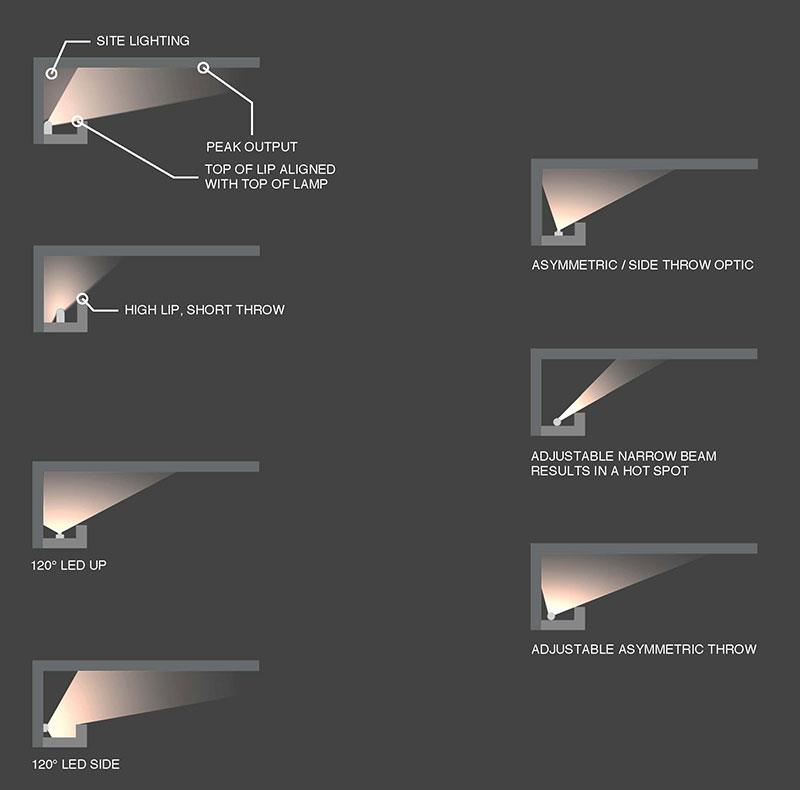
Fluorescents were omni-directional so they would emit light in all directions, most of which could be trapped in the cove. Several manufacturers developed special optics to “throw” the light farther across the ceiling. This helped, but the more that the light grazes the ceiling at small angles, the more inefficient it is; remember that Cosine correction issue. This can be exacerbated with a reflective ceiling which will also allow you to directly see the images of the light sources. So as a designer, what is your vision? If it is to have a pinstripe hallow, a small cove could work, but if you want a soft even glow across the entire ceiling, then a deeper and wider cove is required.
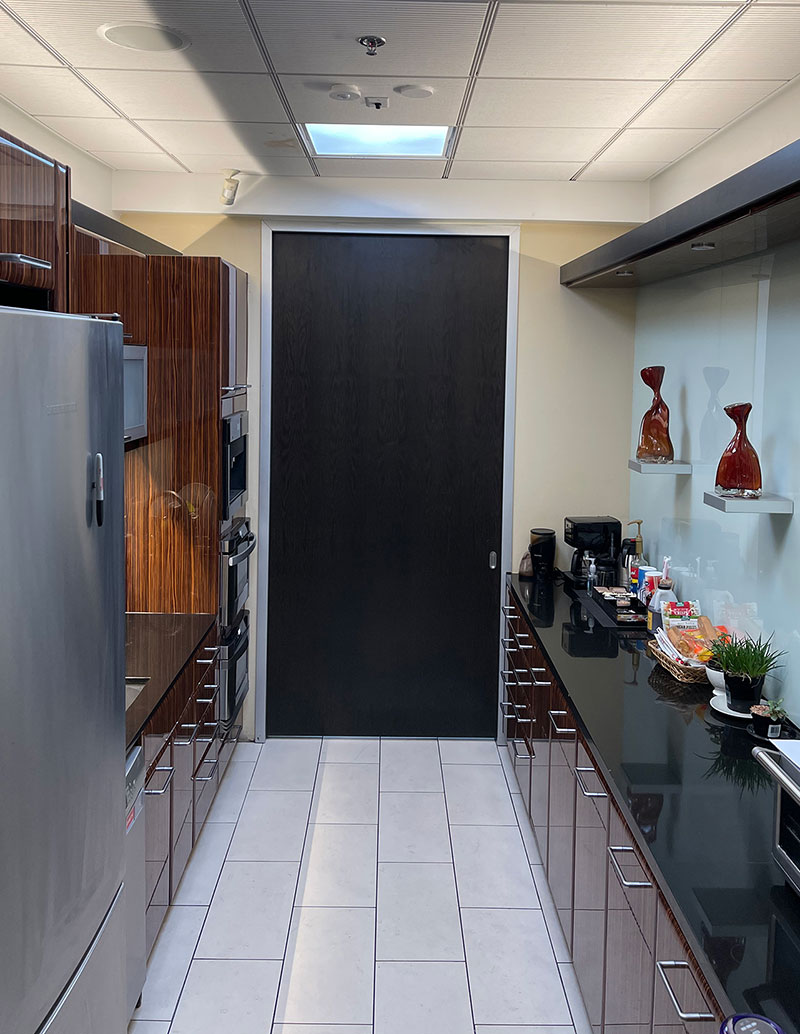
Take a look at this photo. The same cove and the same LED lighting product. Which side do you prefer? For the best results, the design team and the contractors should work in unison to make sure that what gets installed matches the designer’s vision.
With that, remember these top 10 cove recommendations:
- The upper ceiling surface= should be painted matte and the interior should be also painted matte white.
- Align the top of the lip of the cove with the top of the light fixture, to avoid a visible hotspot.
- Make the cove big enough so the light will wash the surface that you intend.
- Make the cove big enough so that the contractor and their tools can fit to properly install it.
- Use line voltage sources, or otherwise properly coordinate the position of the drivers.
- Select the proper beam spread and detail it properly so the orientation and aiming is documented.
- Use an aluminum channel or heatsink, as it helps the contractor to install long, straight runs.
- Remember coves require structure to support their cantilevered ends and even a ladder for maintenance.
- When in doubt, mock it up.
- Proper details will help ensure your desired effect is installed.